Get a jump start on spring: How to Start Seeds Indoors
We are all so eager for spring to arrive and have started to plan our vegetable gardens. To get a jump on the season we are going to start some of our plants from seed.
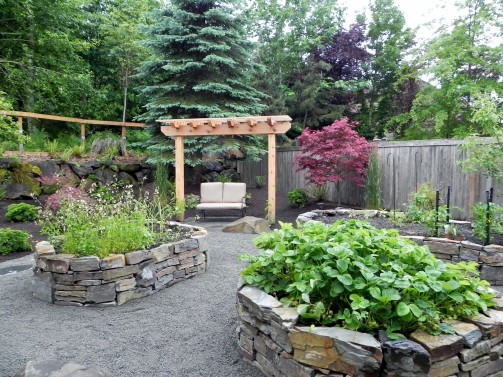
Sammamish Raised Vegetable Beds
There are many reasons to start seeds indoors including potential cost savings, earlier harvest, bigger variety, personal satisfaction and the fun of it.
Starting from seed also allows you to control how the seeds are grown, especially important if you want an organic garden.
There are many ways to approach seed starting, from the high tech to low cost thriftier methods. Having grow lights, heating pads and tightly controlled fertilizer regimen can increase your productivity and quality but can be costly and overwhelming. For most of our typical vegetables and even some annuals you can approach the task with only a few simple tools.
Research and decide what you want to grow. I prefer to go for the easiest and fastest seeds, leaving others to the professionals. Things like tomatoes, broccoli, greens, nasturtiums, onions and marigolds reliably sprout quickly without any special treatment. Others like begonias, geraniums and petunias can be slow and are easier to buy from your local nursery.
A big part of the research is determining the proper timing to start your seeds. Most seed packs will indicate how long it takes to germinate and get to a size where you can transplant out. You then need to figure out when they should go into the garden. For some warm weather loving crops this will be after the last frost in April or May. Leafy greens on the other hand can go out much earlier along with peas and other cool season crops.
March is a good time to start a number of vegetable crops giving us 8-10 weeks until transplant. Many of the seed companies are putting out great ‘cheat sheets’ to help us with the timing in the garden. Territorial Seed Company has a great seed starting chart to help guide you. A few reference books I like are ‘The New Seed Starters Handbook’ by Bubel, and Seattle Tilth’s “Maritime Northwest Garden Guide: Planning Calendar for Year-Round Organic Gardening”.
Materials:
- Container: Seed tray or even small old nursery containers (just sanitize them first)
- Soil: Sterile seed starting soil
- Covering: Dome or other clear covering to go over pots
- Light (natural or artificial): Because of our dark winters and short days an artificial light source is often recommended.
- Watering Bucket: Use a nozzle that provides a gently source of water so you don’t disrupt the seeds.
- Liquid Fertilizer: Liquid fish or kelp fertilizer for organic gardens
- Seeds: Choose seeds best suited for our shorter, cooler growing season and our dry summers.
- Heat Pad (optional): Without the heat source (70-80 deg.) germination will be slower but still successful for most seeds. Things like greens and broccoli need no extra heat to germinate.
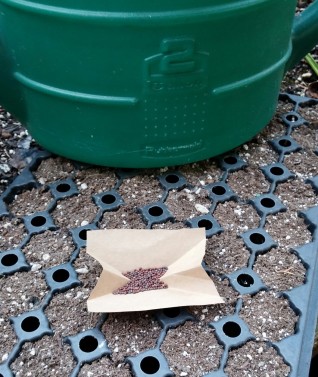
Seeds all ready to be sown
Steps to Start Seeds
- Fill Containers: Start with clean containers and fill them with sterile seeds starting soil, leaving at least ¼” room at the top (this will make watering easier).
- Sow Seeds: A good rule of thumb is to plant them twice as deep as they are. Another approach is to sow on top of the soil and cover the seeds with the same depth of soil.
- Label Crops: Some crops look extremely similar as seedlings like pumpkins, squash and melons. Also vital if you are growing more than one variety of any crop.
- Water: Water seeds well with regular water. There is no need to fertilize at this stage as there are no roots yet to take up the nutrients.
- Cover Containers with Clear Dome: This helps keep the humidity up while allowing light, aiding in the germination process. Remove the dome regularly to check for germination.
- Place Under Lights: Using even your basic long fluorescent fixtures set on a timer work great. I use regular 4’ tubes and have great success while avoid the cost of grow lights.
- Place in Warm Area: Set seeds in a warm area or on a heat mat to increase germination.
- Check for Water Regularly: Gently water with a half strength liquid fertilizer when the top layer of soil begins to dry. Too much or too little water is a common killer of seedlings
- Remove Cover Once Germinated: Once you see the first signs of germination (~5-14 days) remove your covering from the containers and pull them off the heat mat if you used one.
- Thin Seedlings: Thin out seedlings to allow each one the best chance of success.
- Transplant to Larger Containers: Transplant individual seedlings into larger containers (2-3”) once they have their first set of leaves and are an easy size to handle.
- Space out Containers: Space new seedlings to allow room to grow and increase airflow to prevent disease problems.
- Harden Off: A week or so before transplanting out, begin moving seedlings to a cooler but still bright area of the house or garage. The goal is to not shock the plants with the temperature.
- Transplant to the Garden: When the plants are nicely rooted into their containers and the weather is warm enough transplant them outside. Refer to your seed packets or reference books for temps and timing on each crop.
Get out there and start planting! I highly recommend doing it as a group project with friends and neighbors. You can share seed packets and materials to maximize diversity. It’s also a great project to plan and start with your kids!
Share your successes and struggles with us. What are you growing? What have you had trouble with or always wanted to try?


Organized under Edible Gardening, Garden Tips & Advice. Labeled as Edible Plants, Seeds.